Saturday, 21 July 2012

jQuery x y document coordinates of DOM object

offset()
Get the current offset of the first matched element, in pixels, relative to the document.
position()
Gets the top and left position of an element relative to its offset parent.

            var x = $("#wrapper2").offset().left;
            var y = $("#wrapper2").offset().top;

            console.log('x: ' + x + ' y: ' + y);
                        output:
            x: 53 y: 177
 
         hope it helps what you're looking for.

Monday, 9 July 2012

Tips for Writing High-performance SQL

These tips apply broadly when writing high-performance stored procedures. Unfortunately, unlike some tips, you can't simply apply most of them without first considering the nature and schema of the data you're querying.

Avoid using cursors (as well as other looping structures) as much as possible. Cursors are inefficient, and database engines usually don't have the best loop implementations in terms of performance.
  1. On the database side, you can usually replace code involving cursors with aggregate SQL statements (SELECT, INSERT, and UPDATE) that use vector tables. All database engines are heavily optimized for aggregate statements, so even if a loop is unavoidable, it is always better to execute a few aggregate statements in a loop with a small number of iterations, than to create a cursor and execute simple statements over a large number of iterations.

    Even if initial performance tests, especially with a small amount of data, show cursors to be more efficient than a complex aggregate statement, it is worthwhile to try to optimize the operation by breaking it into smaller portions or using other approaches—unless you can guarantee that the data value will stay small. Cursor approaches will not scale.

  2. Filter data wisely. One alternative to using cursors uses a fall-through approach, filtering and aggregating data in multiple steps via a set of data storages, which could be physical tables, temporary tables, or table variables. It is usually best to include some aggregate filters into aggregate statements to filter out the majority of data in one simple shot whenever necessary, working on smaller amounts of data. Then you can proceed with joining and filtering, making sure to keep the number of join permutations under control at all times.

  3. It is usually more efficient to execute multiple statements with one condition than a single statement with multiple OR conditions when executing UPDATE and DELETE statements against permanent database tables that can be accessed by multiple users simultaneously. This tip is especially important from the scalability point of view; from the performance point of view the difference is usually marginal. The major reason for the tip is the locking of the database records and the lock escalations that occur behind the scenes.

  4. Make wise distinctions between temp tables and table variables. Table variables are in-memory structures that may work from 2-100 times faster than temp tables. But keep in mind that access to table variables gets slower as the volume of data they contain grows. At some point, table variables will overflow the available memory and that kills the performance. Therefore, use table variables only when their data content is guaranteed not to grow unpredictably; the breaking size is around several thousand records. For larger data volumes, I recommend temp tables with clustered indexes. Interestingly, I've found that a temp table with one clustered index is often faster than having multiple simple indexes. In contrast, multiple simple indexes with physical tables are often faster than one clustered index.

  5. Make careful distinctions between hard rules and assumptions. This is more of a business design tip, which applies more to code design than to performance and scalability design in general. In real life however, performance and scalability are generally the first things to suffer from improper design. When rules are implemented as assumptions, they usually cause unnecessary calculations to be performed, affecting performance. However, when assumptions are implemented as rules they tend to cause errors and algorithm failures, which usually requires an urgent redesign. That, in turn, is usually performed with business constraints and results in inefficient final algorithms. That's because bad design decisions are often corrected in a rush and without sufficient resources—sometimes under pressure from customers whose businesses are usually in a critical stage when problems are uncovered, but must continue operating during the process.

  6. Pay attention to join order. Using proper join order sometimes lets the database engine generate hints that execute joins with an optimal amount of records. Most database engines also support hard hints, but in most cases you should avoid using hard hints and let the database engine figure out the best way to do its job on its own.

  7. Be careful when joining complex views to other views and database tables in complex SELECT statements. When the database contains a significant amount of data, SQL Server engine tends to recalculate the execution plan of the resulting statement, which often results in an inefficient execution plan and may kill the performance. The most difficult part is that the behavior of SQL Server engine is inconsistent in that respect, and heavily depends on the database size, indexes, foreign keys, and other database structures and constraints. The consistent work-around is to pre-select data from the view into a temp table with the reasonable pre-filters, and then use that temp table in place of the underlying view.

  8. Create indexes on temp tables wisely. As mentioned in Tip 4, clustered indexes are usually the best in terms of performance for temp tables; however, there is a difference between creating the index before or after inserting data into the temp table. Creating the index before the insert complicates the insert, because the database engine must order the selection. For complex selections such as those mentioned in Tip 7, the extra ordering may overcomplicate the overall statement and drastically degrade the performance. On the other hand, creating the index after the insert forces the database engine to recalculate the execution plan of the stored procedure every time it is called. Therefore, the decision is always a trade-off and you should make it based on the relative costs of the two possibilities.

  9. In general, try to avoid execution plan recalculation. One common cause of recalculation occurs when the stored procedure contains several paths that depend on values passed in parameters. However, whether avoiding recalculation is possible depends on the complexity of the stored procedure and on other circumstances, such as those described in tip 8. When the engine does recalculate execution, performance always suffers; however, recalculating the execution plan of the caller does not force the execution plan recalculation of the called procedure (or view or function). Therefore, the workaround is to divide one stored procedure into multiple procedures (depending on the passed-in parameters), and then call the children from the parent conditionally. You should perform this subdivision very carefully though, because it can be a maintenance nightmare—but sometimes it seems to be the only way to achieve acceptable database performance and scalability.
Finally, although this isn't either a performance or a scalability tip, I urge you to format your stored procedure scripts legibly. It's best to agree on common practices such as clause order and formatting rules with your coworkers in advance. Not only does that help avoid errors, it also clearly shows the logical structure of the statements and often aids in figuring out faulty filters and joins.

This list of tips is certainly not exhaustive, but they probably cover the most important performance and scalability factors. Still, there's nothing like an example to drive home the point. The Sudoku solution described in the rest of this article illustrates the techniques in the first six tips.

Sunday, 20 May 2012

Serializing and Deserializing Objects…to and from…XML

Over on the Asp.Net forums I recently had the opportunity* to help a few lost souls by showing them how to serialize objects to XML and deserialize the XML back into objects. Since the question has come up more than once, I decided to BLOG it so I could refer similar questions in the future to this post.
*I use the word opportunity because by helping others I am forced to think hard about the technology and to think even harder about how to communicate the technology. It makes me better at what I do. All right then, enough after-school-special-feel-good-about-yourself-I'm-ok-you're-ok fluffy nonsense… on with the code:
Here is a simple class I'm going to work with. It has both properties and fields:
public class MyClass
{
    // old school property
    private int _Age;  
    public int Age  
    {
        get { return _Age; }
        set { _Age = value; }
    }
 
    // new school property
    public bool Citizen { get; set; }
 
    // there's nothing wrong with using fields
    public string Name;  
}
Here are the two functions to Serialize and Deserialize an object:
/// ---- SerializeAnObject -----------------------------
/// <summary>
/// Serializes an object to an XML string
/// </summary>
/// <param name="AnObject">The Object to serialize</param>
/// <returns>XML string</returns>
 
public static string SerializeAnObject(object AnObject)
{
    XmlSerializer Xml_Serializer = new XmlSerializer(AnObject.GetType());
    StringWriter Writer = new StringWriter();      
 
    Xml_Serializer.Serialize(Writer, AnObject);
    return Writer.ToString();
}
 
 
/// ---- DeSerializeAnObject ------------------------------
/// <summary>
/// DeSerialize an object
/// </summary>
/// <param name="XmlOfAnObject">The XML string</param>
/// <param name="ObjectType">The type of object</param>
/// <returns>A deserialized object...must be cast to correct type</returns>
 
public static Object DeSerializeAnObject(string XmlOfAnObject, Type ObjectType)
{       
    StringReader StrReader = new StringReader(XmlOfAnObject);
    XmlSerializer Xml_Serializer = new XmlSerializer(ObjectType);
    XmlTextReader XmlReader = new XmlTextReader(StrReader);
    try
    {
        Object AnObject = Xml_Serializer.Deserialize(XmlReader);
        return AnObject;
    }
    finally
    {
        XmlReader.Close();
        StrReader.Close();
    }
}
Here is some sample code showing how to use the functions.
Note: I keep these functions (and other functions) in a class I call MiscUtilities. You will have to modify the code…depending on where you place the functions.
protected void Button1_Click(object sender, EventArgs e)
{
    // create and initialize an object
    MyClass Test = new MyClass();
 
    Test.Age = 18;
    Test.Name = "Rocky Balboa";
    Test.Citizen = true;
 
    //  Serialize it
    String XML;
 
    XML = MiscUtilities.SerializeAnObject(Test);
 
    // Deserialize it
    MyClass Test2;
 
    Test2 = MiscUtilities.DeSerializeAnObject(XML, typeof(MyClass)) as MyClass;
 
    // TODO:  Get a cup of coffee and bask in the glory of rock solid code.
}
Here is what the XML string looks like (after formatting):
<?xml version="1.0"?>
<MyClass xmlns:xsi="http://www.w3.org/2001/XMLSchema-instance" xmlns:xsd="http://www.w3.org/2001/XMLSchema">
  <Name>Rocky Balboa</Name>
  <Age>18</Age>
  <Citizen>true</Citizen>
</MyClass>
There are limitations: XmlSerializer does not serialize private fields, methods, indexers or read-only fields.
Once you have the XML string, you can email it, store it in a database, save it to disk, or…print a copy of it and have your mom tape it to the refrigerator next to the picture of a turkey you made in second grade by tracing around your hand with a Crayola crayon.

refer: http://weblogs.asp.net/stevewellens/archive/2009/07/02/serializing-and-deserializing-objects-to-and-from-xml.aspx

Thursday, 17 May 2012

Simple FTP file upload in C# 2.0

Sometimes you just want a simple function to perform a simple task. There are a lot of FTP libraries for free download on the Internet, but if you simply want to upload a file to an FTP server in C#, these libraries are overkill for that simple little task. That's what I thought when I browsed the web for such a simple little function. Maybe I'm slower than normal people, but I couldn't find any simple method on the web. They where all too complicated, so I thought to myself that I could do better.
Here's what I came up with:
private static void Upload(string ftpServer, string userName, string password, string filename)
{
   using (System.Net.WebClient client = new System.Net.WebClient())
   {
      client.Credentials = new System.Net.NetworkCredential(userName, password);
      client.UploadFile(ftpServer + "/" + new FileInfo(filename).Name, "STOR", filename);
   }
}

Then call the method with the right parameters, and you're set to go:
Upload("ftp://ftpserver.com", "TheUserName", "ThePassword", @"C:\file.txt");
Can it get any simpler than that?

Wednesday, 16 May 2012

Windows Server 2008 R2 Enable Multiple RDP sessions


Problem

Server 2008 unlike its predecessors, comes with the multiple remote desktop session restriction enabled. If you are only connecting to a server for remote administration purposes that can get a bit annoying, especially if you have a generic administrative account that multiple techs are using, and you keep kicking each other off the server.
Just as with earlier versions of Windows server you CAN have two RDP sessions at any one time, the restriction is one logon for one account. Thankfully you can disable the restriction and there are a number of ways to do so.


Solution

Option 1: Enable Multiple RDP sessions from TSCONFIG

1. On the server, click Start and in the search/run box type tsconfig.msc{enter}. Locate "Restrict each user to a single session" Right click > Properties.
2. Remove the tick from "Restrict each user to a single session" > Apply > OK.

Option 2: Enable Multiple RDP sessions via the registry

1. Start > in the search/run box type regedit {enter} > Navigate to:
Locate the fSingleSessionPerUser value > Set it to 0 (Multiple sessions allowed), or 1 (Multiple sessions NOT allowed).

Option 3: Enable Multiple RDP sessions via Local Policy

1. Start > in the search/run box type gpedit.msc {enter}.
2. Navigate to:
Locate the "Restrict Remote Desktop Services users to a single Remote Desktop Services session" setting.
3. To enable multiple sessions set the policy to disabled > Apply > OK.

Option 4: Enable Multiple RDP sessions via Group Policy

1. On a domain controller > Start > in the search/run box type gpmc.msc {enter}.
2. Either edit an existing GPO that's linked to your COMPUTERS, or create a new one and give it a sensible name.
3. Navigate to:
Locate the "Restrict Remote Desktop Services users to a single Remote Desktop Services session" setting.
4. To enable multiple sessions set the policy to disabled > Apply > OK.
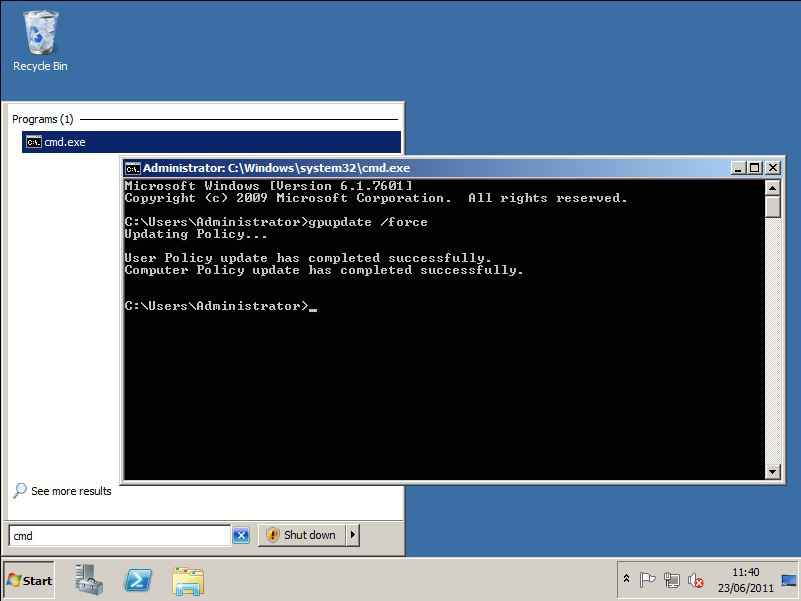
5. Then either reboot the clients, wait a couple of hours, or manually run "gpupdate /force" on them.


source:  http://www.petenetlive.com/KB/Article/0000471.htm

Friday, 27 April 2012

How to Change the Password Policy on Server 2008

You configure the password policy on your Windows 2008 server network by using the group policy object, or GPO. The GPO controls all aspects of your network including the password policy. The password policy preferences include setting a required length, characters and frequency for which the password must be changed. The benefit of a password policy is the protection from unauthorized access if a Windows 2008 password is compromised.

Instruction


1. Click the Windows "Start" button and enter "gpedit.msc" into the text box. Press "Enter" to open the GPO editor.
2. Click the "Computer Configuration" icon on the left side of the GPO editor. In the list of options displayed under this icon, click "Windows Settings," "Security Settings," "Account Policies" and then "Password Policy." This displays a list of password policy options in the center details pane.

3. Double-click one of the password policy options you want to implement. For instance, if you want to require a specific password length, double-click "Minimum password length." This opens a configuration dialog window.
4. Enter the properties for the policy. For instance, for the minimum password length, enter the minimum amount of characters required for a password. A typically minimum number of characters is eight for a network password.
5. Click the "OK" button to save your changes. Continue changing each policy until you have completed the requirements for the password policy. Close the GPO editor when you complete the changes.


Configuring the Windows Server 2008 R2 Firewall to Open Ports for 2X Solutions

To use 2X products on Windows Server 2008 R2 with Windows Firewall enabled, a group of ports must be opened for the services to communicate. The figure below shows the ports in use by 2X Software to communicate between 2X Services on different machines:
Sebastian 4.28.10 Figure 1
Note: In Figure 1, the “>>” implies direction, so that if Server A is connecting to Server B, it will show “A >> B”.
There are two ways to open ports in Windows 2008 R2: either using the MMC or by using the command line. To open a port in the firewall using the GUI, please do the following:
  • Open Port TCP 20002 on a Windows Server 2008 R2.
  • Logon using an administrator account.
  • Click Start and type “Firewall Advanced” in the Search box, or choose Start > Administrative Tools > Windows Firewall with Advanced Security.
  • If you use the search box, a list containing “Windows Firewall with Advanced Security” will appear; click on “Windows Firewall with Advanced Security” and the MMC will appear (Figure 2)
Sebastian 4.28.10 Figure 2
By default, the Windows Firewall will be enabled, and the following rules established: “Inbound Connections that do not match a rule are blocked,” and “Outbound connections that do not match a rule are allowed.”
Since the firewall configuration is already set to allow all outgoing connections, ports to be opened must be configured using the “Inbound Rules” option, by clicking on Inbound Rules on the left of the MMC (Figure 3), and click New Rule from the Right of the MMC (Figure 4).
 >Sebastian 4.28.10 Figure 3
Sebastian 4.28.10 Figure 4
The resulting wizard has five steps: Rule Type, Program/Protocol and Ports, Action, Profile and Name.
In the Rule Type section, select Port and click Next.
In the Protocol and Ports section, select the type of port (ex: TCP or UDP), using Figure 1.
Select the specific local ports and enter the port you wish to open, according to your scenario setup and Figure 1 (ex: Port 20002); then click Next.
In the Action section, select Allow the Connection, and click Next.
In the Profile section, make all three selections and click Next. If you wish to limit the connection to a particular profile, you can do so by selecting only the profiles you think are appropriate to your setup. As this section is somewhat unclear, it may be best to leave the port open in all profiles.
In the Name section, enter “2X Port number 20002”. You may change the 20002 to the port number you entered in the “Specific local ports” section. Include a description of the port, and why the selected port was opened (Ex: “Port in use by 2X to connect to 2X Publishing Agent”). Then click Finish.
Repeat the procedure above for each port and/or protocol you’d like to open. You’re now free to communicate safely!

Reference: http://www.2x.com/blog/2010/04/tech/configuring-the-windows-server-2008-r2-firewall-to-open-ports-for-2x-solutions/

Tuesday, 24 April 2012

SQL Server: Easily importing XML Files

In SQL Server  importing XML files became very easy.
OPENROWSET now supports the BULK keyword which lets us import XML files with ease.
A little example:

CREATE TABLE XmlImportTest
(
    xmlFileName VARCHAR(300),
    xml_data xml
)
GO

DECLARE @xmlFileName VARCHAR(300)
SELECT  @xmlFileName = 'c:\TestXml.xml'
-- dynamic sql is just so we can use @xmlFileName variable in OPENROWSET
EXEC('
INSERT INTO XmlImportTest(xmlFileName, xml_data)

SELECT ''' + @xmlFileName + ''', xmlData 
FROM
(
    SELECT  * 
    FROM    OPENROWSET (BULK ''' + @xmlFileName + ''' , SINGLE_BLOB) AS XMLDATA
) AS FileImport (XMLDATA)
')
GO
SELECT * FROM XmlImportTest

DROP TABLE XmlImportTest

SINGLE_BLOB is recommended when importing XML files because only it supports all Windows encoding conversions.

http://weblogs.sqlteam.com/mladenp/archive/2007/06/18/60235.aspx

Wednesday, 11 April 2012

1. Introduction to SMS Messaging

1.1. What is SMS (Short Message Service)?

SMS stands for Short Message Service. It is a technology that enables the sending and receiving of messages between mobile phones. SMS first appeared in Europe in 1992. It was included in the GSM (Global System for Mobile Communications) standards right at the beginning. Later it was ported to wireless technologies like CDMA and TDMA. The GSM and SMS standards were originally developed by ETSI. ETSI is the abbreviation for European Telecommunications Standards Institute. Now the 3GPP (Third Generation Partnership Project) is responsible for the development and maintenance of the GSM and SMS standards.
As suggested by the name "Short Message Service", the data that can be held by an SMS message is very limited. One SMS message can contain at most 140 bytes (1120 bits) of data, so one SMS message can contain up to:
  • 160 characters if 7-bit character encoding is used. (7-bit character encoding is suitable for encoding Latin characters like English alphabets.)
  • 70 characters if 16-bit Unicode UCS2 character encoding is used. (SMS text messages containing non-Latin characters like Chinese characters should use 16-bit character encoding.)
SMS text messaging supports languages internationally. It works fine with all languages supported by Unicode, including Arabic, Chinese, Japanese and Korean.
Besides text, SMS messages can also carry binary data. It is possible to send ringtones, pictures, operator logos, wallpapers, animations, business cards (e.g. VCards) and WAP configurations to a mobile phone with SMS messages.
One major advantage of SMS is that it is supported by 100% GSM mobile phones. Almost all subscription plans provided by wireless carriers include inexpensive SMS messaging service. Unlike SMS, mobile technologies such as WAP and mobile Java are not supported on many old mobile phone models.


1.2. Concatenated SMS Messages / Long SMS Messages

One drawback of the SMS technology is that one SMS message can only carry a very limited amount of data. To overcome this drawback, an extension called concatenated SMS (also known as long SMS) was developed. A concatenated SMS text message can contain more than 160 English characters. Concatenated SMS works like this: The sender's mobile phone breaks down a long message into smaller parts and sends each of them as a single SMS message. When these SMS messages reach the destination, the recipient mobile phone will combine them back to one long message.
The drawback of concatenated SMS is that it is less widely supported than SMS on wireless devices.


1.3. EMS (Enhanced Messaging Service)

Besides the data size limitation, SMS has another major drawback -- an SMS message cannot include rich-media content such as pictures, animations and melodies. EMS (Enhanced Messaging Service) was developed in response to this. It is an application-level extension of SMS. An EMS message can include pictures, animations and melodies. Also, the formatting of the text inside an EMS message is changeable. For example, the message sender can specify whether the text in an EMS message should be displayed in bold or italic, with a large font or a small font.
The drawback of EMS is that it is less widely supported than SMS on wireless devices. Also, many EMS-enabled wireless devices only support a subset of the features defined in the EMS specification. A certain EMS feature may be supported on one wireless device but not on the other.

http://www.developershome.com/sms/smsIntro.asp


Wednesday, 28 March 2012

SQL PRIMARY KEY Constraint

SQL PRIMARY KEY Constraint

The PRIMARY KEY constraint uniquely identifies each record in a database table.
Primary keys must contain unique values.
A primary key column cannot contain NULL values.
Each table should have a primary key, and each table can have only ONE primary key.

SQL PRIMARY KEY Constraint on CREATE TABLE

The following SQL creates a PRIMARY KEY on the "P_Id" column when the "Persons" table is created:
MySQL:
CREATE TABLE Persons
(
P_Id int NOT NULL,
LastName varchar(255) NOT NULL,
FirstName varchar(255),
Address varchar(255),
City varchar(255),
PRIMARY KEY (P_Id)
)
SQL Server / Oracle / MS Access:
CREATE TABLE Persons
(
P_Id int NOT NULL PRIMARY KEY,
LastName varchar(255) NOT NULL,
FirstName varchar(255),
Address varchar(255),
City varchar(255)
)
To allow naming of a PRIMARY KEY constraint, and for defining a PRIMARY KEY constraint on multiple columns, use the following SQL syntax:
MySQL / SQL Server / Oracle / MS Access:
CREATE TABLE Persons
(
P_Id int NOT NULL,
LastName varchar(255) NOT NULL,
FirstName varchar(255),
Address varchar(255),
City varchar(255),
CONSTRAINT pk_PersonID PRIMARY KEY (P_Id,LastName)
)
Note: In the example above there is only ONE PRIMARY KEY (pk_PersonID). However, the value of the pk_PersonID is made up of two columns (P_Id and LastName).


SQL PRIMARY KEY Constraint on ALTER TABLE

To create a PRIMARY KEY constraint on the "P_Id" column when the table is already created, use the following SQL:
MySQL / SQL Server / Oracle / MS Access:
ALTER TABLE Persons
ADD PRIMARY KEY (P_Id)
To allow naming of a PRIMARY KEY constraint, and for defining a PRIMARY KEY constraint on multiple columns, use the following SQL syntax:
MySQL / SQL Server / Oracle / MS Access:
ALTER TABLE Persons
ADD CONSTRAINT pk_PersonID PRIMARY KEY (P_Id,LastName)
Note: If you use the ALTER TABLE statement to add a primary key, the primary key column(s) must already have been declared to not contain NULL values (when the table was first created).

To DROP a PRIMARY KEY Constraint

To drop a PRIMARY KEY constraint, use the following SQL:
MySQL:
ALTER TABLE Persons
DROP PRIMARY KEY
SQL Server / Oracle / MS Access:
ALTER TABLE Persons
DROP CONSTRAINT pk_PersonID