Problem | ||
Server 2008 unlike its predecessors, comes with the multiple remote desktop session restriction enabled. If you are only connecting to a server for remote administration purposes that can get a bit annoying, especially if you have a generic administrative account that multiple techs are using, and you keep kicking each other off the server.
Just as with earlier versions of Windows server you CAN have two RDP sessions at any one time, the restriction is one logon for one account. Thankfully you can disable the restriction and there are a number of ways to do so.
| ||
Solution | ||
Option 1: Enable Multiple RDP sessions from TSCONFIG1. On the server, click Start and in the search/run box type tsconfig.msc{enter}. Locate "Restrict each user to a single session" Right click > Properties.  Option 2: Enable Multiple RDP sessions via the registry1. Start > in the search/run box type regedit {enter} > Navigate to:Locate the fSingleSessionPerUser value > Set it to 0 (Multiple sessions allowed), or 1 (Multiple sessions NOT allowed).  Option 3: Enable Multiple RDP sessions via Local Policy
1. Start > in the search/run box type gpedit.msc {enter}.

2. Navigate to:
Locate the "Restrict Remote Desktop Services users to a single Remote Desktop Services session" setting.

3. To enable multiple sessions set the policy to disabled > Apply > OK.
 Option 4: Enable Multiple RDP sessions via Group Policy
1. On a domain controller > Start > in the search/run box type gpmc.msc {enter}.

2. Either edit an existing GPO that's linked to your COMPUTERS, or create a new one and give it a sensible name.

3. Navigate to:
Locate the "Restrict Remote Desktop Services users to a single Remote Desktop Services session" setting.

4. To enable multiple sessions set the policy to disabled > Apply > OK.

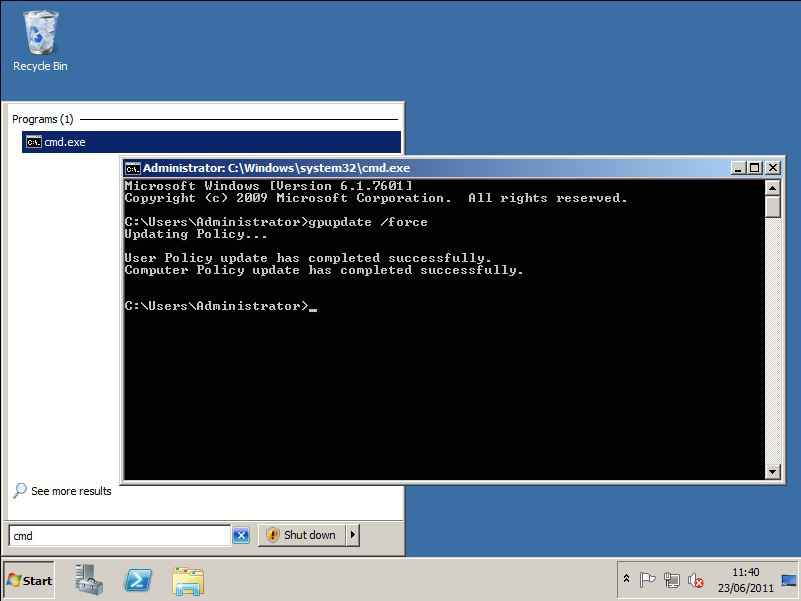
5. Then either reboot the clients, wait a couple of hours, or manually run "gpupdate /force" on them.
source: http://www.petenetlive.com/KB/Article/0000471.htm
|
Showing posts with label Config Server. Show all posts
Showing posts with label Config Server. Show all posts
Wednesday, 16 May 2012
Windows Server 2008 R2 Enable Multiple RDP sessions

Friday, 27 April 2012
How to Change the Password Policy on Server 2008
You configure the password policy on your Windows 2008 server network by
using the group policy object, or GPO. The GPO controls all aspects of
your network including the password policy. The password policy
preferences include setting a required length, characters and frequency
for which the password must be changed. The benefit of a password policy
is the protection from unauthorized access if a Windows 2008 password
is compromised.
Configuring the Windows Server 2008 R2 Firewall to Open Ports for 2X Solutions
To use 2X products on Windows Server 2008 R2 with Windows Firewall
enabled, a group of ports must be opened for the services to
communicate. The figure below shows the ports in use by 2X Software to
communicate between 2X Services on different machines:
 Note: In Figure 1, the “>>” implies direction, so that if Server A is connecting to Server B, it will show “A >> B”.
There are two ways to open ports in Windows 2008 R2: either using the MMC or by using the command line. To open a port in the firewall using the GUI, please do the following:
 By
default, the Windows Firewall will be enabled, and the following rules
established: “Inbound Connections that do not match a rule are blocked,”
and “Outbound connections that do not match a rule are allowed.”
By
default, the Windows Firewall will be enabled, and the following rules
established: “Inbound Connections that do not match a rule are blocked,”
and “Outbound connections that do not match a rule are allowed.”
Since the firewall configuration is already set to allow all outgoing connections, ports to be opened must be configured using the “Inbound Rules” option, by clicking on Inbound Rules on the left of the MMC (Figure 3), and click New Rule from the Right of the MMC (Figure 4).
 The resulting wizard has five steps: Rule Type, Program/Protocol and Ports, Action, Profile and Name.
In the Rule Type section, select Port and click Next.
In the Protocol and Ports section, select the type of port (ex: TCP or UDP), using Figure 1.
Select the specific local ports and enter the port you wish to open, according to your scenario setup and Figure 1 (ex: Port 20002); then click Next.
In the Action section, select Allow the Connection, and click Next.
In the Profile section, make all three selections and click Next. If you wish to limit the connection to a particular profile, you can do so by selecting only the profiles you think are appropriate to your setup. As this section is somewhat unclear, it may be best to leave the port open in all profiles.
In the Name section, enter “2X Port number 20002”. You may change the 20002 to the port number you entered in the “Specific local ports” section. Include a description of the port, and why the selected port was opened (Ex: “Port in use by 2X to connect to 2X Publishing Agent”). Then click Finish.
Repeat the procedure above for each port and/or protocol you’d like to open. You’re now free to communicate safely!
Reference: http://www.2x.com/blog/2010/04/tech/configuring-the-windows-server-2008-r2-firewall-to-open-ports-for-2x-solutions/

There are two ways to open ports in Windows 2008 R2: either using the MMC or by using the command line. To open a port in the firewall using the GUI, please do the following:
- Open Port TCP 20002 on a Windows Server 2008 R2.
- Logon using an administrator account.
- Click Start and type “Firewall Advanced” in the Search box, or choose Start > Administrative Tools > Windows Firewall with Advanced Security.
- If you use the search box, a list containing “Windows Firewall with Advanced Security” will appear; click on “Windows Firewall with Advanced Security” and the MMC will appear (Figure 2)

Since the firewall configuration is already set to allow all outgoing connections, ports to be opened must be configured using the “Inbound Rules” option, by clicking on Inbound Rules on the left of the MMC (Figure 3), and click New Rule from the Right of the MMC (Figure 4).
>


In the Rule Type section, select Port and click Next.
In the Protocol and Ports section, select the type of port (ex: TCP or UDP), using Figure 1.
Select the specific local ports and enter the port you wish to open, according to your scenario setup and Figure 1 (ex: Port 20002); then click Next.
In the Action section, select Allow the Connection, and click Next.
In the Profile section, make all three selections and click Next. If you wish to limit the connection to a particular profile, you can do so by selecting only the profiles you think are appropriate to your setup. As this section is somewhat unclear, it may be best to leave the port open in all profiles.
In the Name section, enter “2X Port number 20002”. You may change the 20002 to the port number you entered in the “Specific local ports” section. Include a description of the port, and why the selected port was opened (Ex: “Port in use by 2X to connect to 2X Publishing Agent”). Then click Finish.
Repeat the procedure above for each port and/or protocol you’d like to open. You’re now free to communicate safely!
Reference: http://www.2x.com/blog/2010/04/tech/configuring-the-windows-server-2008-r2-firewall-to-open-ports-for-2x-solutions/
Subscribe to:
Posts (Atom)